YouTube Upload Defaults - What They Are and How to Set Them
Feb 7, 2022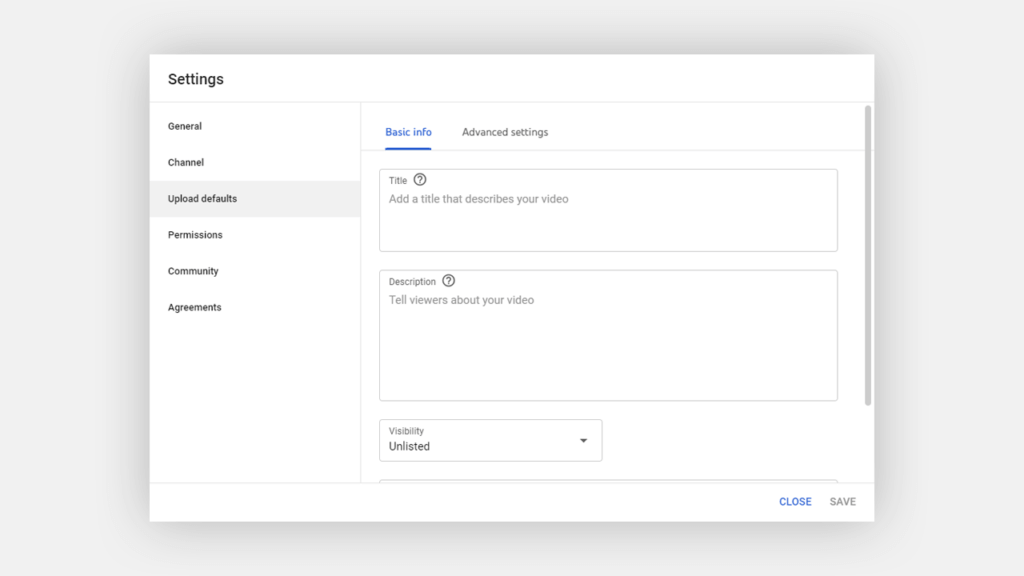
Trying to find out some information about YouTube upload defaults? If so, you've come to the right place.
Many different things can be done to make operating a YouTube channel more efficient. One such thing is utilizing upload defaults. But what exactly are upload defaults, and which settings do they impact?
In this article, you will learn:
YouTube Default Upload Settings
How to Set Default Description on YouTube
YouTube Default Tags
Read on and learn everything you need to know about upload defaults on YouTube.
YouTube Default Upload Settings
There are a lot of small tasks that are required to be completed before you can publish a video on YouTube. Due to this, many creators search for ways to be more efficient so they can publish videos faster. Luckily, by utilizing upload defaults, this can be accomplished.
Here's how you can set YouTube default upload settings for your channel:
- Go to the YouTube Studio
- Select the Settings option from the menu
- Choose the Upload defaults option
- Fill out your default upload settings
- Save your settings
Let's go over this process in more detail.
1. Go to the YouTube Studio
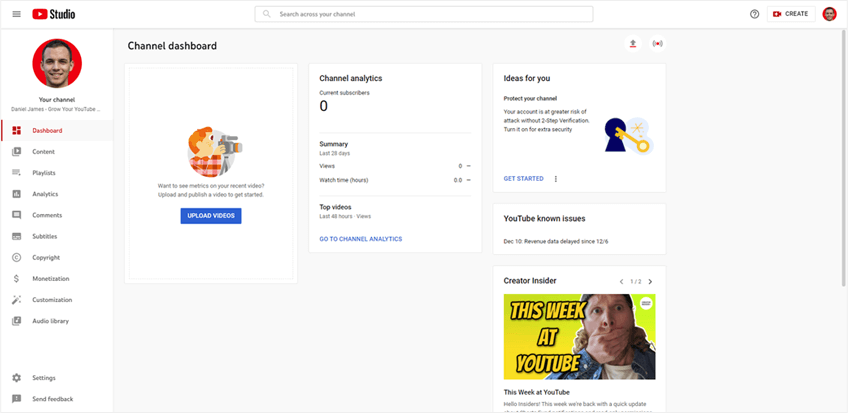
To begin, you must first go to the YouTube Studio. To get to the YouTube Studio, select your profile icon while logged in on YouTube. From there, select the YouTube Studio option from the menu that appears.
2. Select the Settings Option From the Menu
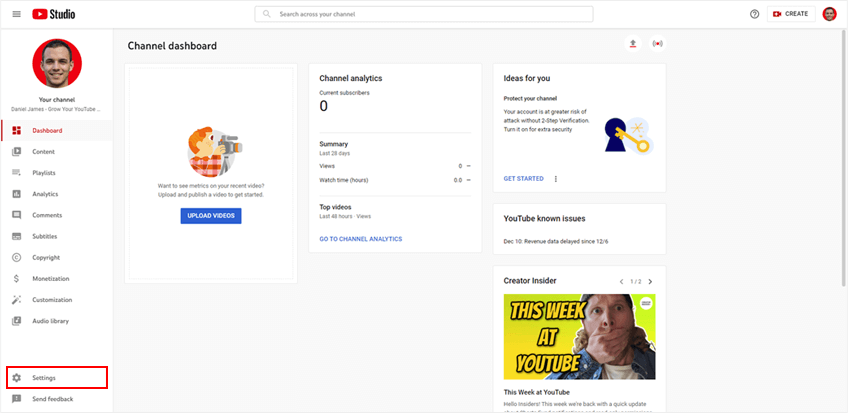
Next, you will need to select the Settings option from the menu. This option will be located on the menu on the left side of your screen while inside of the YouTube Studio. It should be located near the bottom of the menu.
3. Choose the Upload Defaults Option
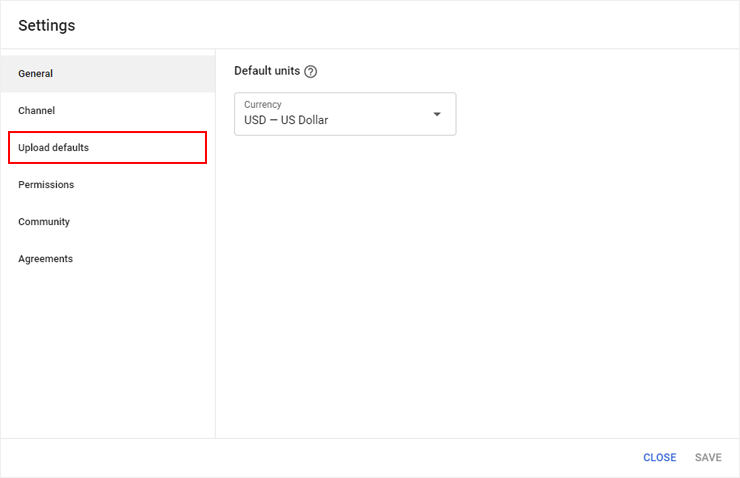
After selecting the Settings option from the menu, a new box should appear on your screen. In this box, a new menu will be present on the left side. The menu option you need to select is the Upload defaults option.
4. Fill Out Your Default Upload Settings
On this screen, you can fill out your desired default upload settings. Be sure to fill out settings in both the basic and advanced tabs to ensure that you do not miss any settings that need to be set.
Default upload settings you can set include:
- Video language
- Comments settings
Remember, the settings you select will apply to every video uploaded after the settings have been saved. So, if you set a default video category, it will be used for every video that is uploaded to your channel.
5. Save Your Settings
Once you have set your upload defaults, you must save your settings. Doing this is as simple as clicking the save button located in the bottom right corner of the menu box. If you do not save your settings, none of your selected defaults will be applied to future uploads.
How to Set Default Description on YouTube
Filling out the description boxes of videos can be a time-consuming process. One of the ways the process can be done quicker is by setting a default description template for all of the videos you upload.
Here's how to set a default description on YouTube:
- Go to the YouTube Studio
- Choose the Settings option from the menu
- Select the Upload defaults option
- Fill out the description box
- Save the changes
Let's go over this process further.
1. Go to the YouTube Studio
To start the process of setting a default description for your videos, begin by going to the YouTube Studio. Getting to the YouTube Studio is as simple as selecting your YouTube channel icon and selecting the corresponding menu option.
2. Choose the Settings Option From the Menu
After you have entered into the YouTube Studio, your next objective is to choose the Settings option from the menu located on the left side of the screen. This option will be located towards the bottom of the screen.
3. Select the Upload Defaults Option
Choosing the Settings option from the menu in the YouTube Studio should cause a new box to appear on your screen. Present in this box will be another menu. As you probably guessed, you'll need to select the Upload defaults option from the menu.
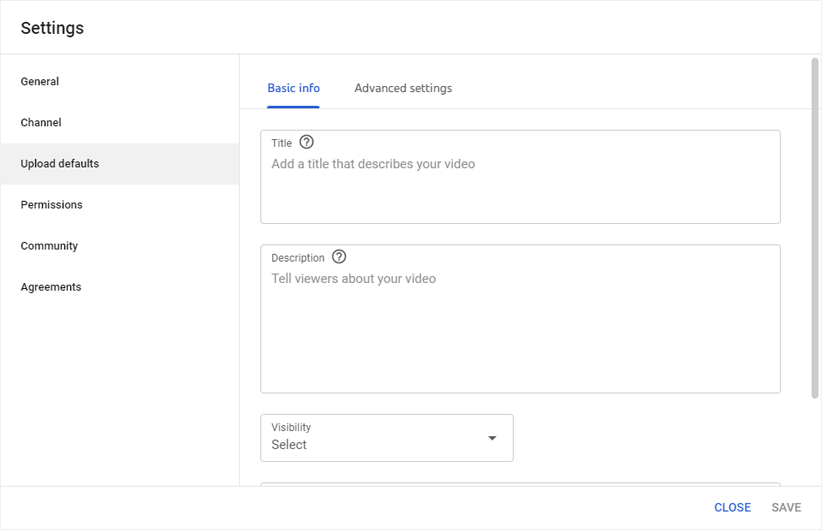
4. Fill Out the Description Box
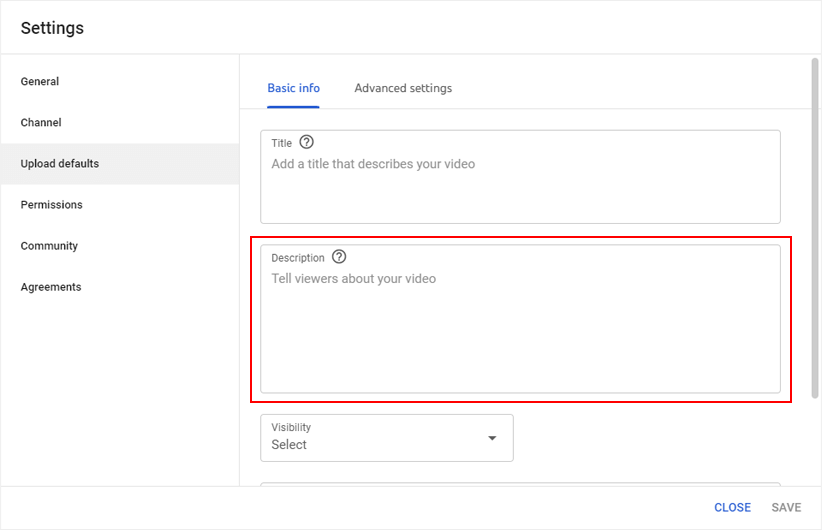
Upon selecting the Upload defaults menu option, you will be greeted by a description box. Here, you can fill out the information you'd like to be present in your video descriptions by default when they are uploaded.
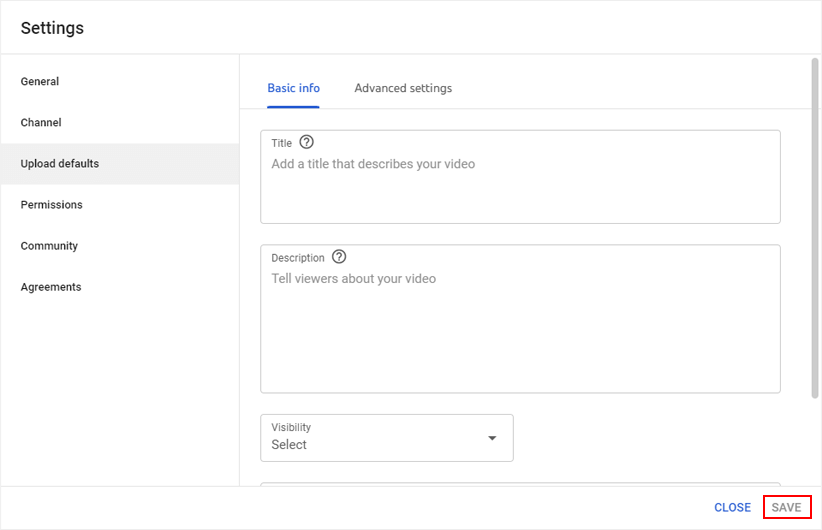
5. Save the Changes
As with everything, you must ensure that you save your settings for the changes you made to take place. So, once you have finished filling out the description box with your desired default description, make sure you click the save button.
YouTube Default Tags
In the past, many content creators used unique tags for all of their videos. Nowadays, most creators have found it to be more ideal to use the same set of tags for all of their videos. Fortunately, this can be done easily by setting default tags in the YouTube Studio.
Here's how this can be done:
- Visit the YouTube Studio
- Click the Settings option from the menu
- Choose the Upload defaults option
- Fill out the tags box
- Select the save option
Let's discuss this process further.
1. Visit the YouTube Studio
Start by visiting the YouTube Studio. To get to this location, sign in on the channel you wish to set default tags for. Then, choose the YouTube Studio option from the menu that appears after clicking your channel icon.
2. Click the Settings Option From the Menu
As you did when changing your default video description, you must click the Settings option from the menu located inside of the YouTube Studio. Remember, you must be inside of the YouTube Studio to do this- it can't be done from the home screen.
3. Choose the Upload Defaults Option
The only way you can set default tags for your videos is to get to the screen that will let you do so. Luckily, this can be done quickly and easily. Choose the Upload defaults option from the menu in the box that pops up after clicking the Settings option from the main menu.
4. Fill Out the Tags Box
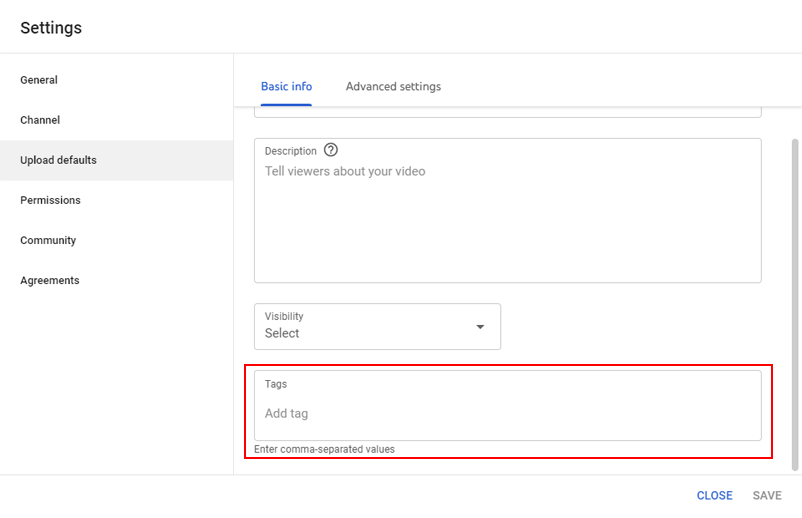
Similar to setting a default description, setting default tags is as simple as entering your desired tags into the correct text box. Try choosing tags that represent your channel and the content you create as a whole so they can be semi-relevant for every video you upload.
5. Select the Save Option
After inputting your desired tags into the correct text box, ensure your settings are saved by clicking the Save button. This button should be located in the bottom right corner of the box on your screen.
Conclusion
You now know everything you need to know about setting YouTube upload defaults. Whether you're setting a default video description or tag, the process is simple and can save you a lot of time in the future.