How to Vlog on Your Phone - The Complete Guide
Mar 1, 2022
Trying to learn how to vlog on your phone? If you are, you'll find this article to be helpful.
As phone cameras have become better, many people have started using them to film vlogs. While doing so is easy enough, there are a few steps that must be taken to ensure the highest quality footage can be recorded.
In this article, you will learn:
Can You Use Your Phone for Vlogging?
How to Vlog With a Phone
Tips for Vlogging With Phone
What Is the Best App for Vlogging?
Read on and learn everything you need to know about vlogging with a phone.
Can You Use Your Phone for Vlogging?
Before we go any further, we must first address whether or not you can use your phone for vlogging. After all, there's no point in setting up your channel and outlining videos if you can't use your phone to film videos.
You can use your phone for vlogging. Nowadays, the cameras present in phones are more than good enough to capture high-quality footage. At the end of the day, the best camera for vlogging is the camera you have. For most people, this will be a phone.
With this said, it is important to acknowledge that some phones will struggle to record high-quality footage. If your phone is old, you may want to consider upgrading to a newer device with a better camera.
Luckily, phones have had good cameras for almost a decade now. So, you do not need to upgrade to a brand new device to get a camera capable of capturing good vlog footage. A used phone from 2016, for example, will be more than enough to get the job done.
How to Vlog With a Phone
Vlogging with a phone is a simple process. Just press the record button and you're on your way, right? Well, not really. Just because the filming process is simple, it doesn't mean that videos will turn out to be enjoyable to watch- which is what matters to viewers.
Here's how to vlog with a phone:
- Establish your unique selling proposition (USP)
- Select a video format
- Create a video outline
- Film your video
- Edit the footage
- Render the video
Let's go over this process in more detail.
1. Establish Your Unique Selling Proposition (USP)
Before you can even begin filming a vlog, you must first determine what your video will be about. In other words, what is the topic of the video, and how will the video provide value to viewers?
A lot of prospective YouTube vloggers skip over this step and it leads to low-quality content being produced. Remember, people don't watch videos to waste time. They watch them to learn a skill, access information or be entertained.
2. Select a Video Format
Once you've figured out your USP (the value your video will present) you must decide how you can present your vlog. In other words, you must decide which video format you'd like to use to create your video.
Do you want to do a traditional on-the-go style vlog? Or, do you want to film a sit-down-style vlog? Will you have multiple cameras or a single camera? You must determine these things before you film your video so the presentation is consistent.
3. Create a Video Outline
Some people fully script their videos, while others prefer to outline them. In most cases, a video outline will be the ideal choice, as an outline will allow for more flexibility. You don't want your vlogs to be too scripted and rigid- viewers will notice.
An outline is essentially a script without lines. Meaning, it's a template that will help you transition between different sub-topics in your video. This will help improve the flow of your vlogs, which will improve viewer retention rates.
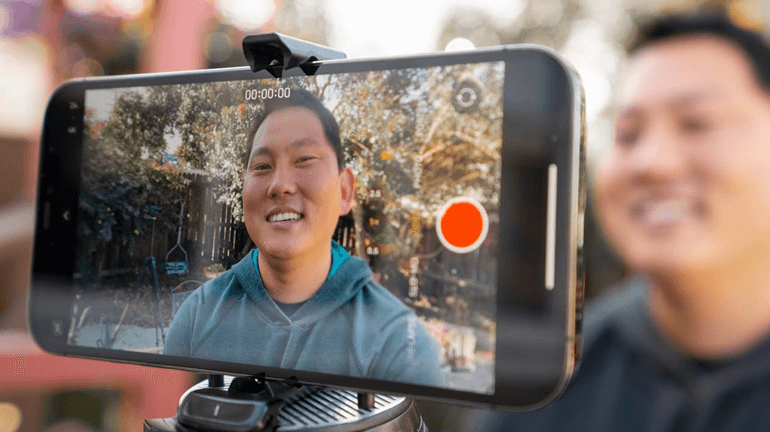
4. Film Your Video
Now that you have everything planned out, you can begin filming your video. Well, sort of. You still need to ensure that you're filming in an environment that is well-lit and does not have a lot of background noise.
So, select a good environment to capture footage before you press the record button. A bad recording environment cannot be fixed through editing. Once you do this, then you can begin the filming process.
5. Edit the Footage
After you've captured all of the footage you need for your vlog, it's time to put it all together. This can be done through the power of video editing. Select an editing program such as Sony Vegas Pro, Adobe Premiere Pro, or iMovie, and start the process.
Keep in mind, most vlogs are more enjoyable to watch when they are edited simply. You do not need to include fancy effects and transitions. Just remove the fluff that doesn't need to be present so the footage flows together naturally.
6. Render the Video
Upon the completion of the editing process, your next objective will be to render the video. Ensure that you render your video in 1080p HD (or 4K) so your footage looks the best it can on YouTube.
Unfortunately, the rendering process often takes a long time. Since this is the case, consider optimizing the metadata of the video while you wait. Or, consider rendering your videos when you do not need your computer.
Tips for Vlogging With Phone
While phones have made vlogging more accessible, they have no made the process easier. That is to say, you must still follow best practices in order to capture high-quality footage. Simply pressing the record button will not get the job done.
Let's go over some tips for vlogging with a phone.
Record Horizontally
A big mistake people make when recording videos with their phones is recording footage vertically. The proper way to record video footage for YouTube is horizontally. So, when you capture footage, do so horizontally.
Utilize Airplane Mode
There's nothing more annoying than receiving a phone call or text message while recording a vlog. To stop this from happening, consider turning on airplane mode before pressing the record button.
Prioritize Lighting
Lighting is essential to capturing high-quality video footage. If you do not record in a well-lit environment, especially with a mobile phone, you will struggle to record footage that looks crisp and has minimal noise.
Use an External Microphone
Unfortunately, the microphones in phones do not produce the highest quality audio recordings. Knowing this, you should consider using an external microphone, such as a lavalier microphone, to capture your voice.
What Is the Best App for Vlogging?
At this point, you're probably wondering- what is the best app for vlogging? Will the standard camera app on your phone get the job done? Or, should you consider installing and using a 3rd-party camera application to capture video footage?
The best app for vlogging (aside from the standard camera app) is FiLMiC Pro. FiLMiC Pro allows users to make adjustments to the quality and visual styling of their footage before the editing phase. This makes it easier to record higher-quality footage.
Something to note is that FiLMiC Pro is a paid app. Meaning, there is no free version. So, if you wish to use it, you will need to purchase it. However, if you're someone who wants to create professional-looking vlogs, the fee is worth it.
Just remember, no app will make up for footage captured in a poor environment. You must still ensure that you follow best practices when recording footage for your vlogs, no matter what app you use.
Conclusion
You now know how to vlog on your phone. While doing so isn't the most complicated process in the world, there are some best practices that must be followed to capture high-quality footage. Failing to follow such best practices will make it difficult to create good vlogs.